
Whether you are a blogging newbie or a blogging veteran, you have probably asked yourself this question – How do I get more followers? You have all of this fantastic content, and brilliant new ideas but your subscribers are limited to the loyal few.
While you appreciate their fandom you also want to reach more people – we get it, blogging is a lifestyle and why blog if you have no one to share it with? Not to mention you can build a valuable asset through your blog. If you are a serious blogger, you need to learn two of the most vital words for your business – email marketing.
Not only will email marketing grow your blog, but it will also help monetize it and promote loyalty. The perfect place to start your venture into email marketing is through the use of ConvertKit. This guide will introduce you to ConvertKit and get you started setting up your new account. If blogging is the future, ConvertKit is your DeLorean.
What is ConvertKit?
ConvertKit is an email application that is specifically designed for bloggers. It does fancy things like:
- Collect your email addresses
- Send out newsletters
- Allow you to automate a big chunk of your email marketing
- Build free landing pages
- Create sales funnels and plenty more!
The only thing you need to do to get started is create an account. New members are offered a free trial period to explore the software and see if it’s going to fit your needs.
We at BloggerTips are predicting that it will be your new best friend. However, it’s ultimately up to you to decide. ConvertKit is not the only email marketing software out there but we have found it to be straightforward to use and beyond helpful when trying to organize and promote your blog. Here are the seven steps to ConvertKit success.
Step One: Setting Up Your Account
Getting started with ConvertKit is very easy. All you have to do is create an account and get it approved! As we mentioned before, an excellent feature about starting with ConvertKit is that you get a 14-day free trial to see if it is for you.
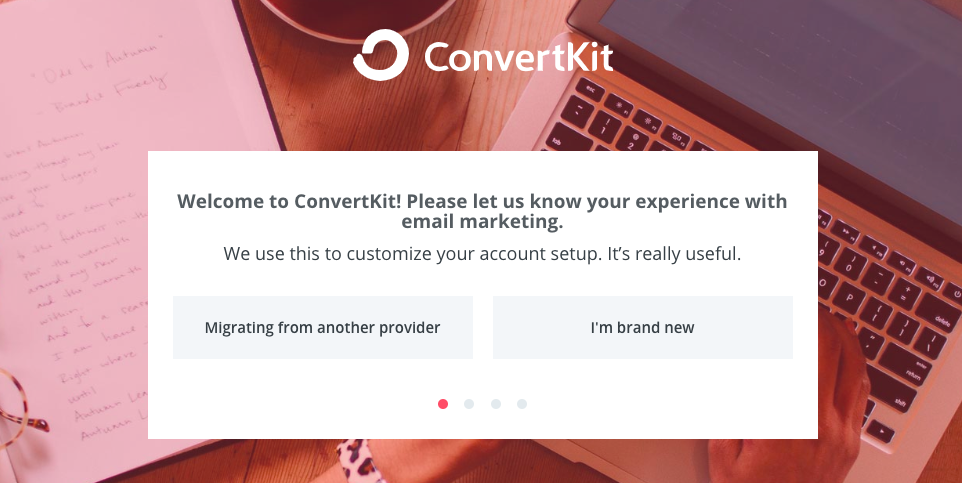
The first question you will be asked is if you are migrating from another provider or are you brand new. Let’s go ahead and assume you are starting fresh, and haven’t used another provider before. Let’s assume you’re new to email marketing.
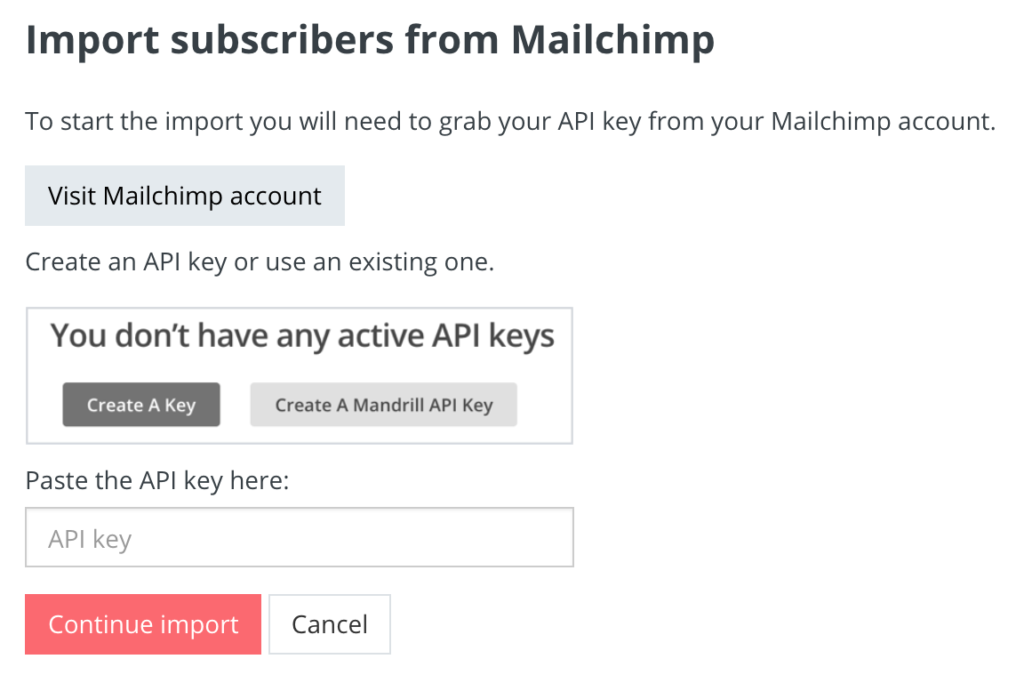
So, go ahead and click ‘I’m brand new.’ Even if you have used another provider and accidentally click that you are new, you can always import your existing subscribers later.
Walking through the setup
After you click your option, you will be prompted through a series of login instructions that you will need to follow until you have login information. Once you are finished, you will see ‘Welcome to your account!’ on the screen.
Next, you will need to put in some general information to set up your account. If you look to the top right-hand corner you will see a circle. Go ahead and click it and choose account settings. You should be prompted to a screen where you will see the following sections:
- Account Info
- Your Profile
- Email Settings
- Billing
Click through those tabs and fill out any required information needed for your account. If you elect to use the 14-day free trial period you can save the Billing section for later. This can happen after you decide if you want to move forward with ConvertKit.
Finishing the setup process
In the Email Settings, you should see that your status is ‘pending.’ You must confirm your email address before you can start using the features of ConvertKit. Check your email for a confirmation email with instructions on how to confirm. If you don’t have a confirmation email in your inbox you can click the ‘resend email’ option. We have all been there.
You will also be required to input your physical mailing address. It is required that the mailing address is real. This will appear at the bottom of each email you send.
A quick tip if you don’t want to use your home address is to get a PO Box. Many companies offer free PO boxes, only charging when you receive mail. This includes the US Postal Service and UPS. Now you should be all set up and are ready to create your first form!
Step Two: Creating a Form in ConvertKit
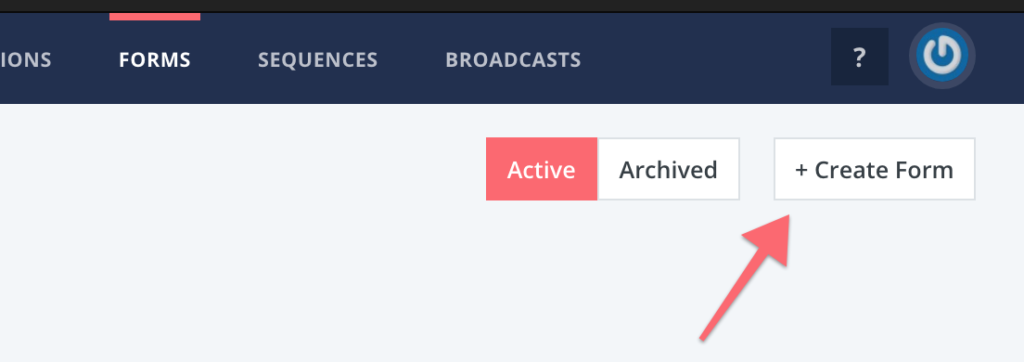
A form is a way to collect your visitor’s contact information so that you can send them emails later. You should see the forms tab in the top left-hand corner. Once you click on it, you will see a create forms button that you will also need to click on.
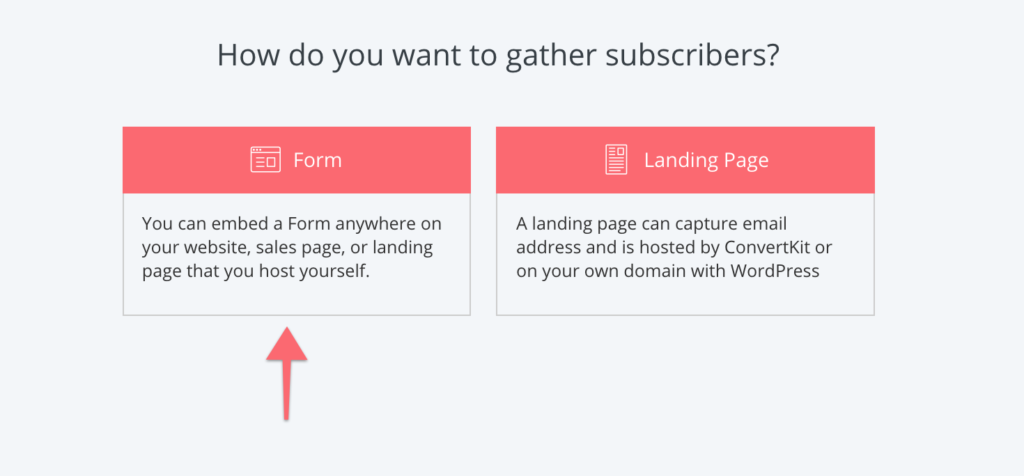
Now, you will use this same process each time you will create a new form. You will see the option to create a form or a landing page. Make sure you pick form and then choose inline. ConvertKit gives you three different design styles to choose from.
Once you choose your style, you can start designing it the way you want it to look. You can preview your design at any time to see what your form will look like. A fan favorite feature of ConvertKit is that some themes have a style override. These will match your theme settings without having to do it manually. This will ultimately save you time and make it easier to design your forms.
Finishing up your form
When you are happy with how your form looks you need to click save and then click the gear icon to choose what happens when a visitor wants to sign up. The default is that they get sent a generic success message, but you can change it to whatever you would like.
Next, you need to click the email icon so you can set up your incentive email. This is important to pay attention to because the default is to auto-confirm all subscribers, but a problem with this is that any email address that is entered will be confirmed.
This could lead to spam emails for you which is not only annoying but also counterproductive. You want to make sure to set up your incentive email.
Once you do that you can go ahead and edit the email form to say what you want. When you have it set up, you can go back to the email settings and choose what happens when someone clicks subscribe. Your two options will be to send them to a URL, or it can automatically download your free opt-in if you have one.

The final step in this section is to grab the code to embed your new form into your website. Look to the top right and select embed. You can choose from Javascript or HTML and paste them into your text editor.
If you have WordPress, you can download the free plugin and paste into your text editor. You can also elect to share the form via social media using a link. Now you have a form to start collecting subscribers! The next step is to send them something.
Step Three: Creating a Broadcast
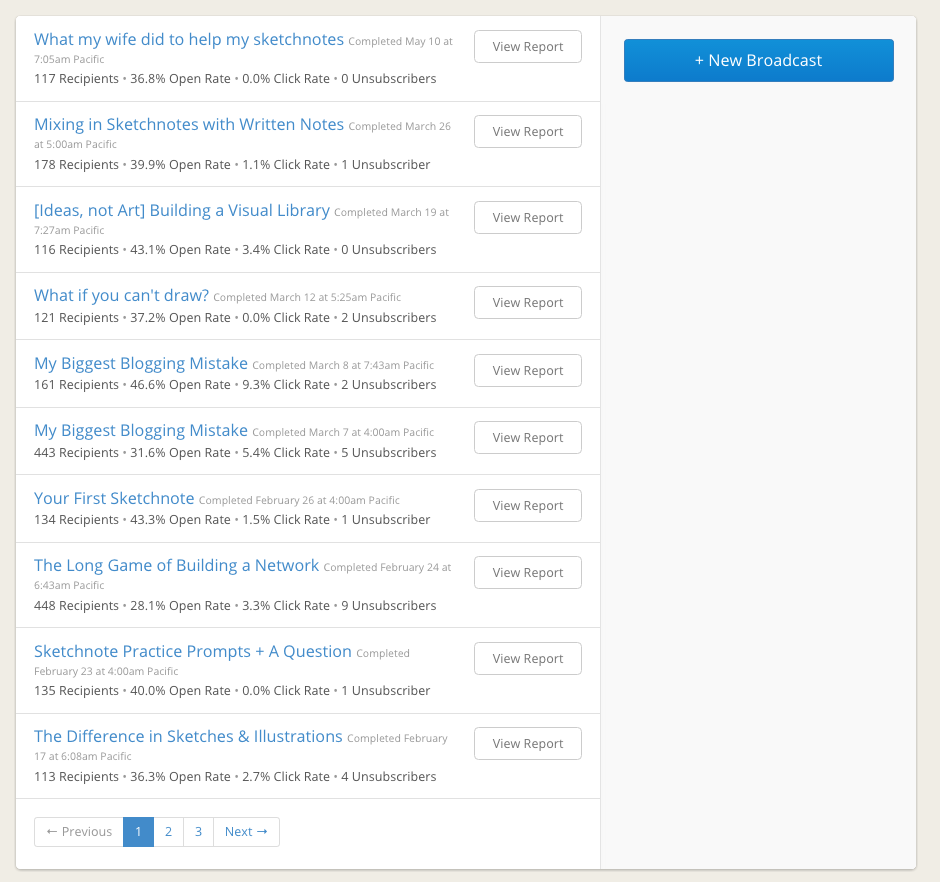
A Broadcast in ConvertKit is any one-off email – an example of this would be a newsletter. The counterpart to a Broadcast is a Sequence, which is a sequence of emails – an example of this would be your welcome series.
To create a Broadcast, you will need to go to the broadcasts section at the top of the screen and click new broadcast. Now you are ready to go through the three-step process: Recipients, Content, and Preview.
Recipients
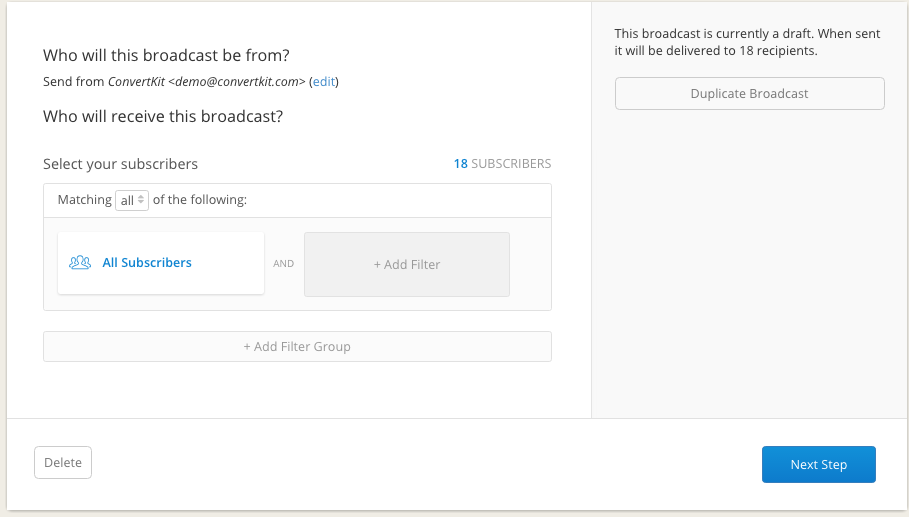
So for your first Broadcast, we can skip this section because it will be more beneficial for you to become acquainted with the next steps of creating a Broadcast first. Later on, when you understand what it is exactly you want to send out to your subscribers, you can revisit this section.
Basically, in the Recipients portion, you will be able to select precisely who gets sent your Broadcast. To create a newsletter, let’s assume you want everyone on your subscribers’ list to receive it so we will leave the Recipients page alone for the time being.
Content
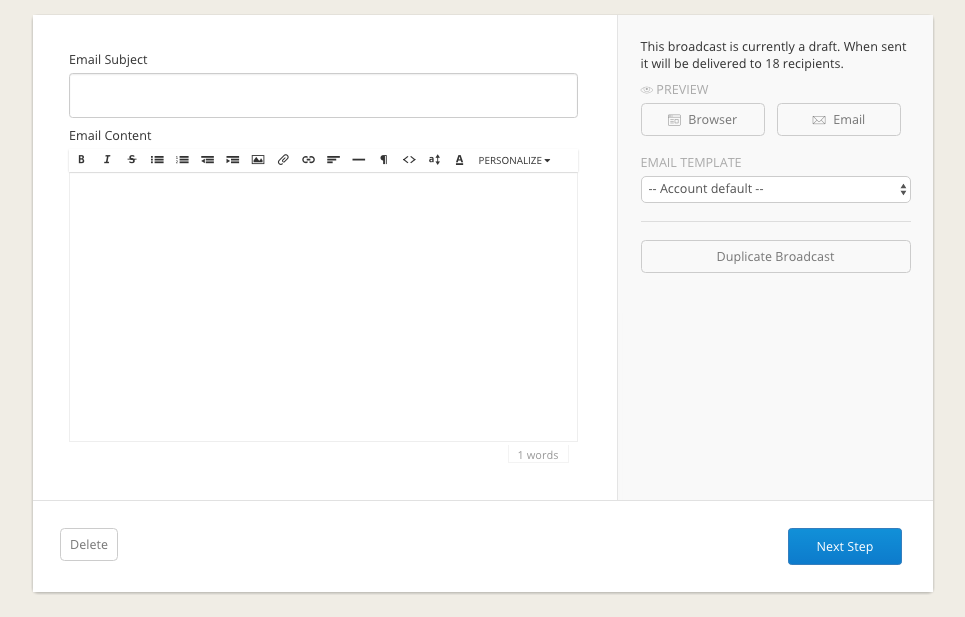
Your screen should now look like a regular email with an Email Subject line and Email Content section. This is pretty straight forward in that you fill it out like you would a typical email and can style it however you want. Once you put all your content in the body of the email, you can select the option to preview what it will look like when you send it to your subscribers.
Just click the preview button on the right-hand side, and a browser will pop up with a preview of your email. Once you are completely satisfied, you can move on the next step.
Preview

As described in the above step, you will have the option to preview your email before sending it out to your subscribers. When you have your final product, you will have options on how you want to send it.
You can elect to send the email immediately or schedule a specific time to send it in the future. If you’re going to save the email for later so you can continue working on it, you can keep it as a draft and come back later.
Step Four: Creating a Sequence
Now that you have a basic understanding of how to create a Broadcast, you can learn how to create a Sequence. It is incredibly easy to do, and it is a great tool to use when welcoming new subscribers to your email list. You can create a Sequence for anything but a welcome email is a great place to start.
First, you will need to click on sequence from the top banner menu and select to create sequence. You will see a screen very similar to the Broadcast screen. At this time you will name your Sequence and then click create sequence.
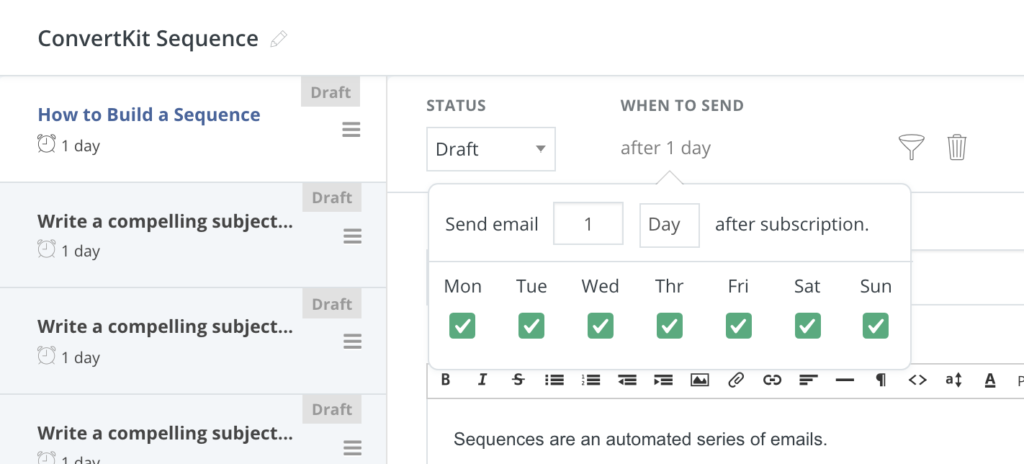
In this next step, you will follow the same protocol for creating a Broadcast and write your email in the same way. The difference here is that since it is a welcome email, you will want to change the when to send to immediately – that way your subscribers will receive it as soon as they sign up. When you have finished, set your status to published. It won’t go anywhere though because it is designed to send when your subscribers sign up, not when you tell it to go.
If you wish to add more emails to your Sequence click add email for each one. For choosing the when to send, you will want to select 1 day so that each email will send one day after the previous email. You can send it at any rate you wish, make sure you specify.
Once all your emails are ready to go, make sure they are set to published and that you save your Sequence. Now you’re ready to move on to creating a simple automation rule for your Sequence!
Step Five: Creating an Automation
You will create automation by using the visual automation editor in ConvertKit. This will allow you to set specific visual rules and pathways to determine precisely who gets an email and at what time.
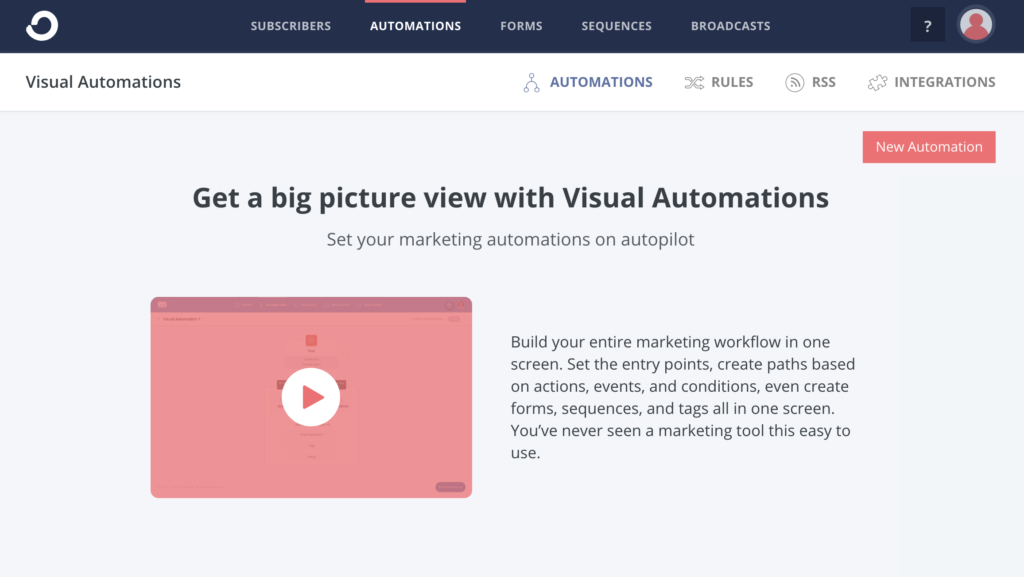
To start, you will want to click on automations in the banner window and then click new automation on the right-hand side. You will then name your automation and click create automation.
Then you will click to add event and then click on the plus sign. Next, choose ‘add a subscriber to… email sequence’ and select the sequence you wish to send. Once selected you will click add action. Look in the top right-hand corner and change paused to live. Now your email sequence has been sent to all the selected subscribers.
Step Six: Excluding Subscribers
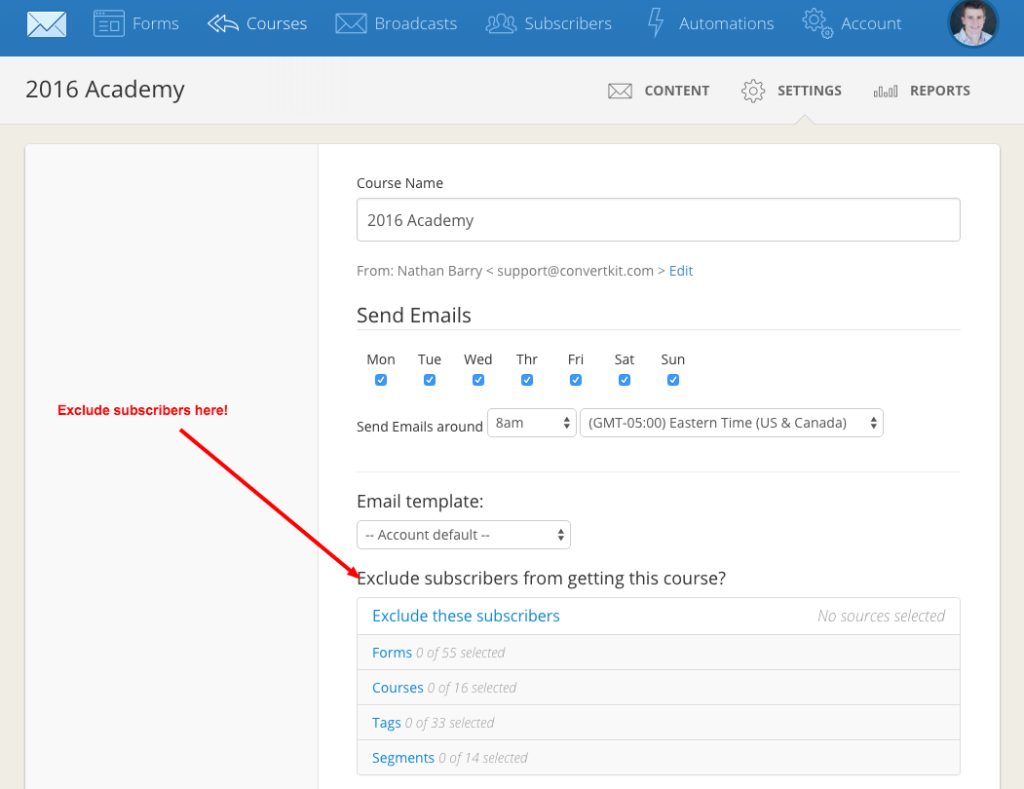
If you want to exclude subscribers from an email sequence, the process is straightforward. Click create a tag on the right and name your tag. A screen will pop up with small checkboxes by each subscriber’s name. Select all the subscribers on the page and select bulk actions => tag and choose the tag you just made. This tags all of your existing subscribers.
Go back to sequences and choose the welcome sequence you just created. Click on settings and choose ‘Exclude subscribers from this sequence.’ Click on tags and again select the tag you just made.
What happens now is that your existing subscribers are excluded from the sequence you selected. To finish the process, you will need to return to the automations and change paused to live. Now your welcome sequence will only go to new subscribers, not existing.
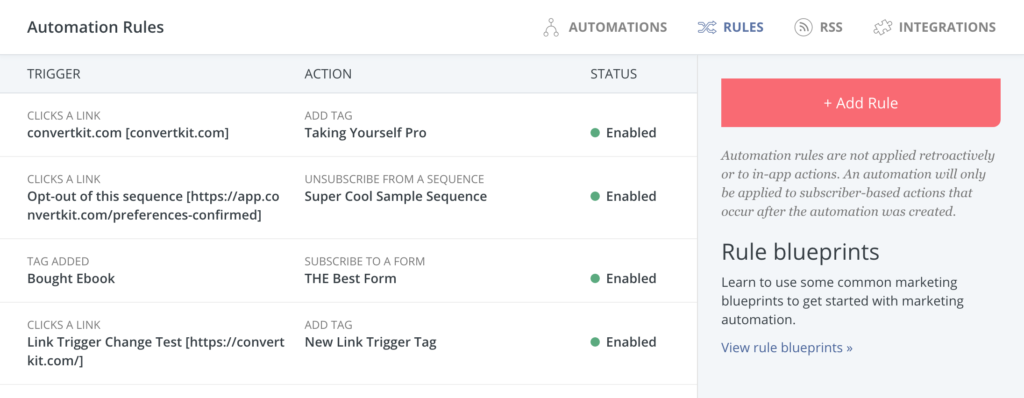
Step Seven: Creating a Rule
By creating a rule, you will be able to track who gets what when you send out an email. You will first go to automations, and select rules then click on add rule. Next, choose trigger – this is where you will select a trigger for when an action is completed.
Choose action and create a tag associated with the trigger. Now when a subscriber receives something, the rule will notify the system which will then tag a subscriber based on what they have received.
Congratulations! You have now successfully finished the ConvertKit tutorial. Additionally, you have learned how to create a form, broadcast, sequence, automations, and rules. You also know how to exclude subscribers if they have already received a particular email. Now you are ready to start your free trial with ConvertKit and reach blogging stardom. Get ready for lots of subscribers with all your new email marketing tricks!
